
The Gerudo Sanctum may both be the second or third dungeon you deal with in The Legend of Zelda: Echoes of Knowledge, relying on which city you determine to save lots of first.
However like several Zelda dungeon, the Gerudo Sanctum is fraught with hazard and difficult puzzles that may simply stump you.

Associated
The Legend of Zelda: Echoes of Knowledge Is, Of Course, Getting The ‘Woke’ Therapy
It did not take lengthy earlier than some individuals have been calling The Legend of Zelda: Echoes of Knowledge “woke”.
For those who’ve discovered your self misplaced within the sandy corners of the Gerudo Sanctum and are not positive the place to go subsequent, we have the entire walkthrough right here for you, so you may tick yet one more Zelda dungeon off your quest checklist.
Find out how to Attain the Gerudo Sanctum
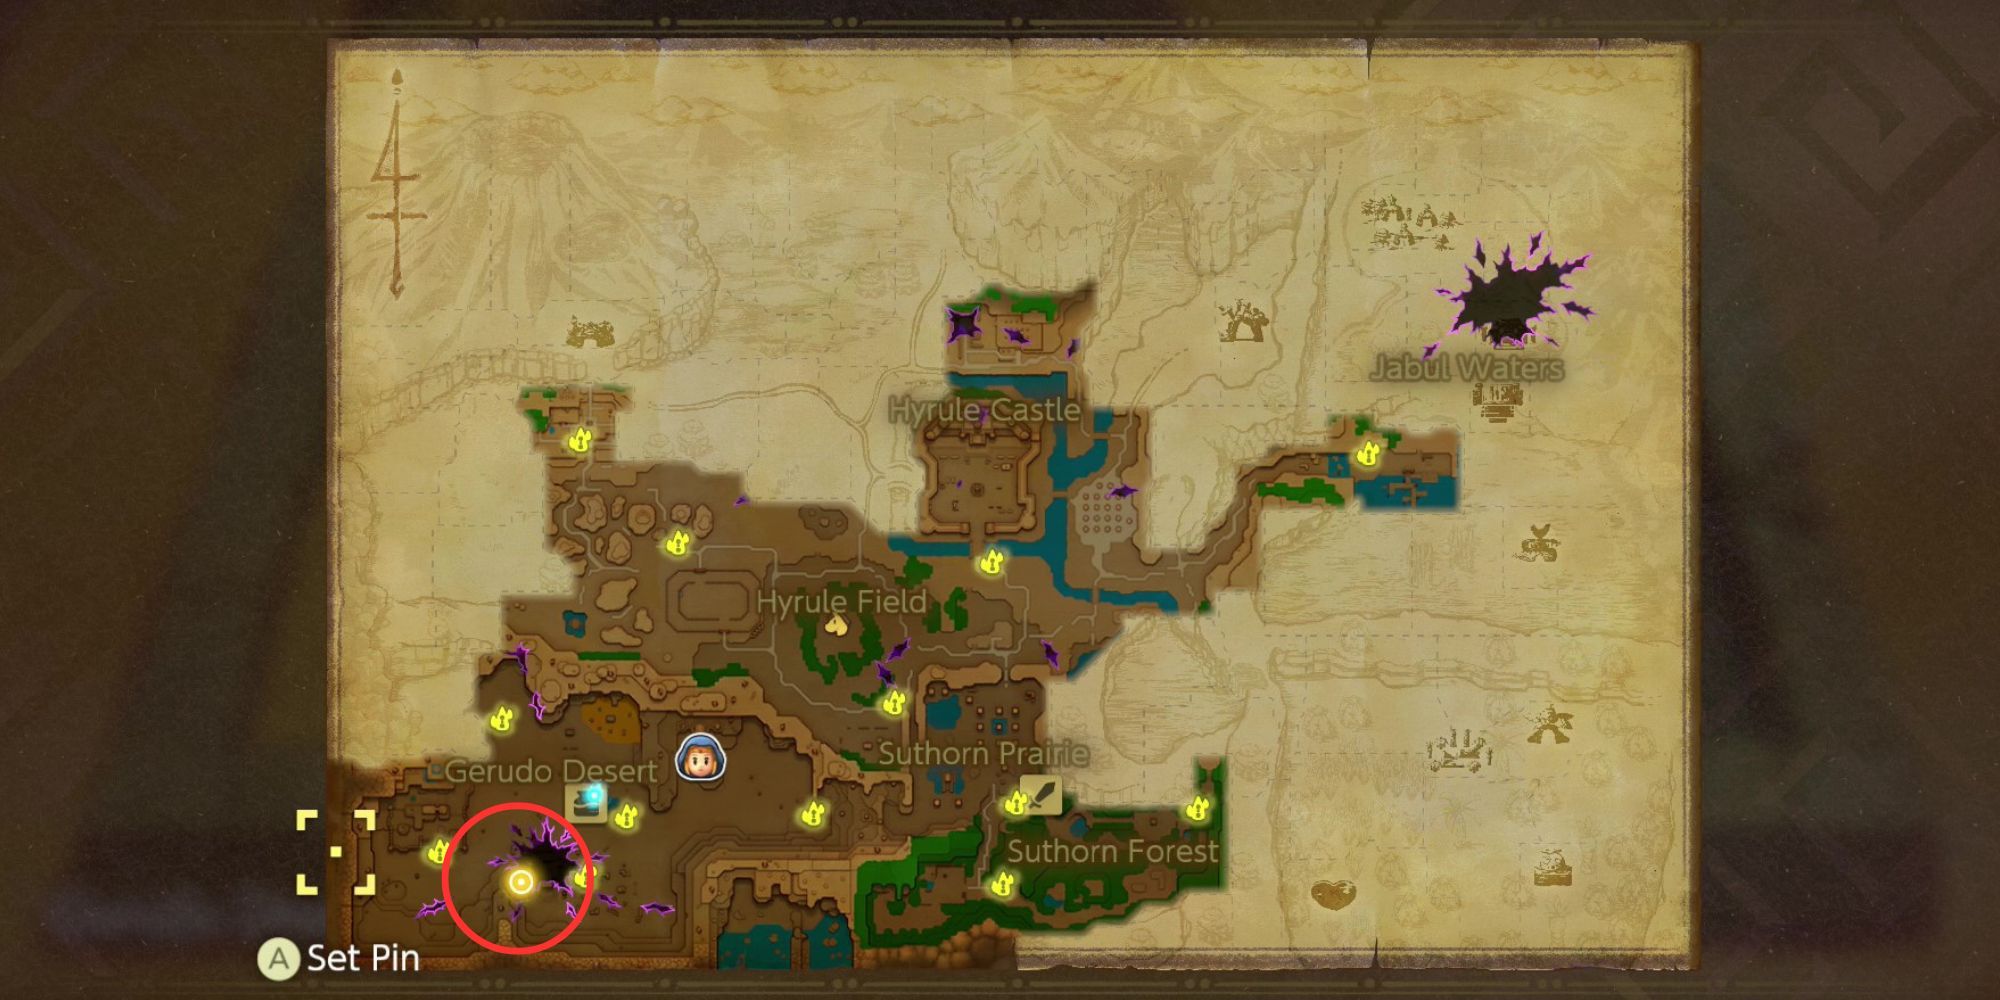
The Gerudo Sanctum is positioned within the Gerudo Desert within the southwestern portion of Hyrule, however there are some things it’s important to do earlier than gaining entry to the dungeon.
You should first clear three smaller Rifts across the desert. These are the Southern Oasis Ruins Rift, the Ancestor’s Cave of Relaxation Rift, the Southern Gerudo Desert Rift, and the Stilled Suthorn Temple Ruins.
Solely then will you be capable of go to the Rift within the southern desert to start your quest to succeed in the Gerudo Sanctum.
Cryptic Cavern Walkthrough
When you lastly obtain the Gerudo Sanctum coordinates and head to the Southern Gerudo Desert, you’ll not be confronted with the Gerudo Sanctum.
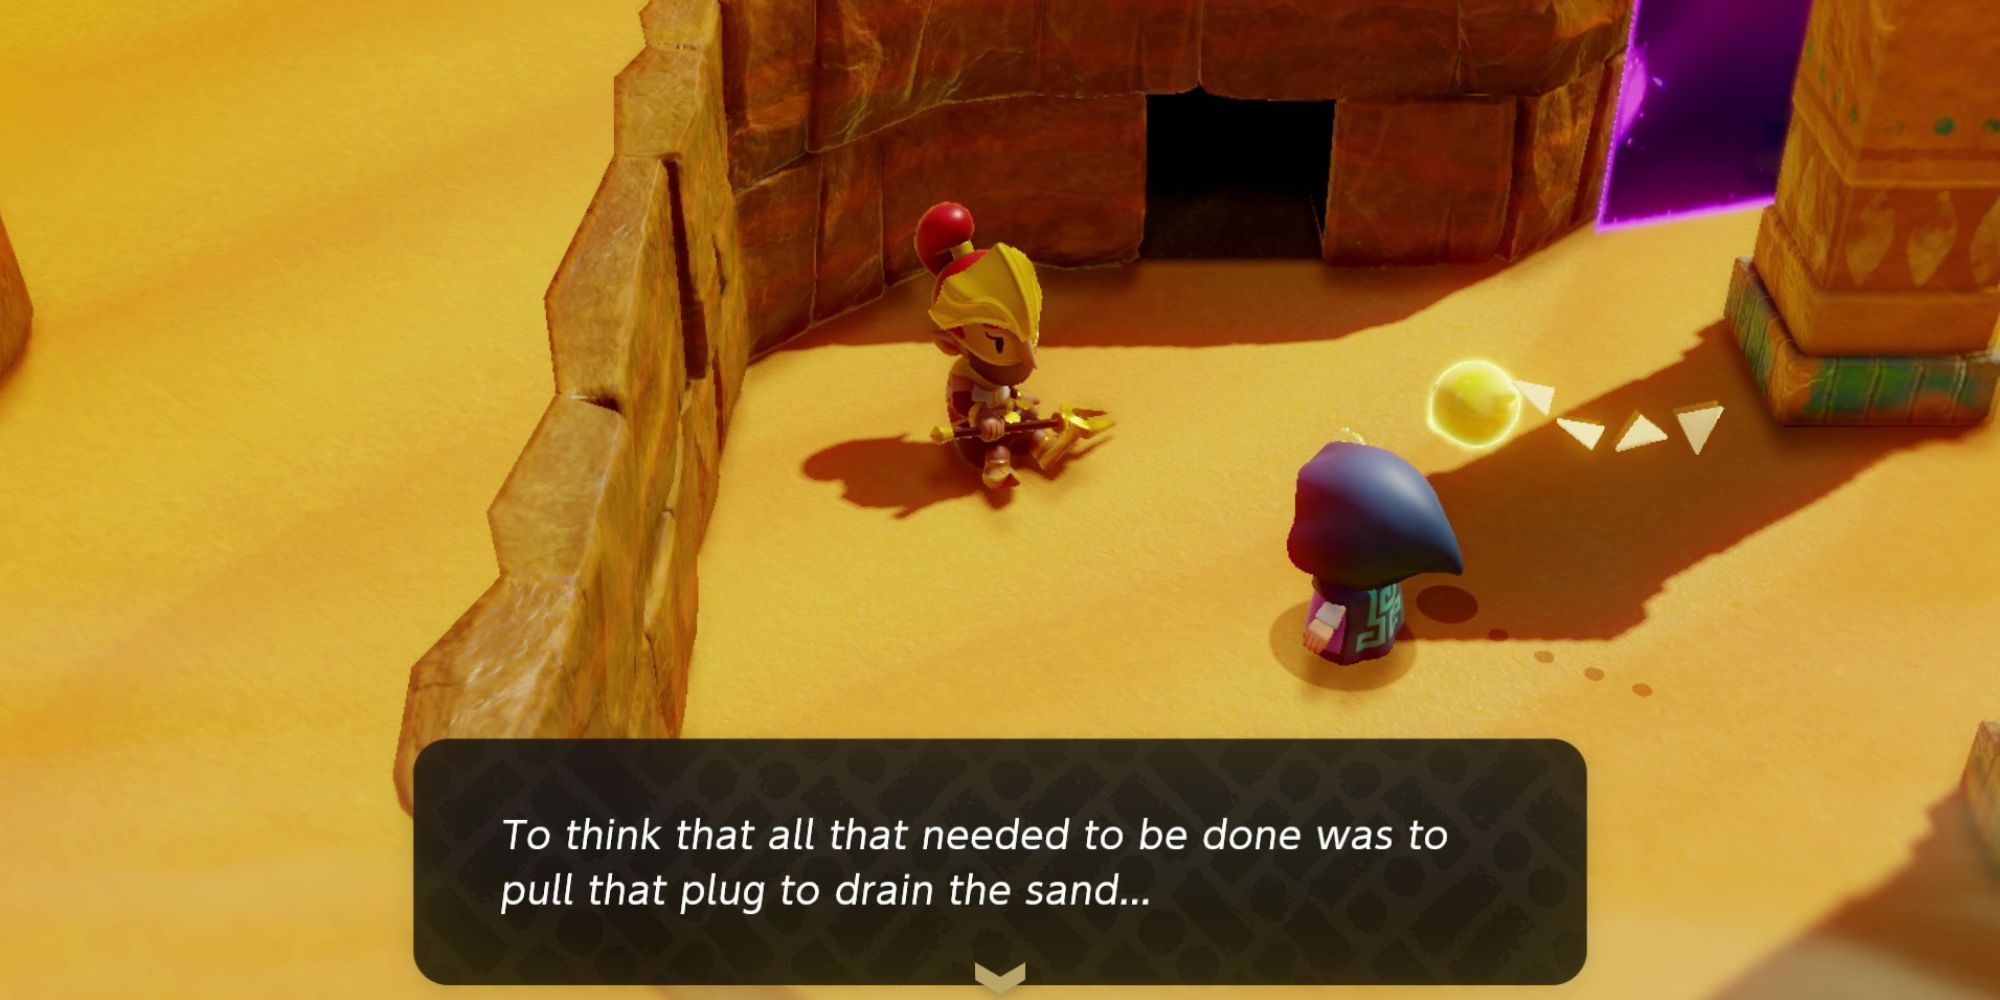
There’s nonetheless yet one more impediment it’s important to overcome earlier than you will get there, and that’s the Cryptic Cavern. The Gerudo Sanctum is crammed with sand that it’s important to drain by pulling a plug on the very again of the Cavern.
To start, head into the cave beside the exhausted Gerudo and hit the change on the left wall to unlock the primary door. There are a lot of methods you may hit the change. You can goal it with a flying enemy, a Spear Moblin, or simply hit it with a rock.
Head into the following room and summon boulders to dam the wind currents earlier than heading by the door alongside the again wall.
Sneak previous the Pathblades or block them with boulders and hit the following blue change to unlock a chest on the precise aspect of the room. Make your method again previous the Pathblades to gather your first Silver Key and exit by the door reverse the chest.

The doorways will lock if you enter the following room and won’t reopen once more till you defeat the entire Scorpions. Summon your favourite fight Echo to take them down and head by the door on the left.
One can find your self again in the identical room you have been in earlier. Make your method again to the locked door on the left and use your new Silver Key to unlock it.
Drop down the ladders on the left and fight the Pathfinder with one in all your personal. Hop your technique to the ladder on the precise and go down to seek out one other Pathfinder to your left.
Defeat it and destroy the pot on the left to gather a fairy earlier than dropping all the way down to the very backside of the cavern. Use Bind to tug the chest previous the Wind Cannon to seek out 20 Rupees and make your technique to the precise.

Destroy the Pathfinders and piles of sand together with your Wind Cannons to clear the underside and center platforms. Stack two picket bins with a Wind Cannon on prime to blow the sand away from the highest left platform and use a Strandtula to climb up there to succeed in the following ladder.
Lastly, defeat the Gibdo blocking your method and use Bind on the plug on the precise aspect of the room to drag it out. Exit by the ladder on the left to enter the Gerudo Sanctum Rift.
Gerudo Sanctum First Flooring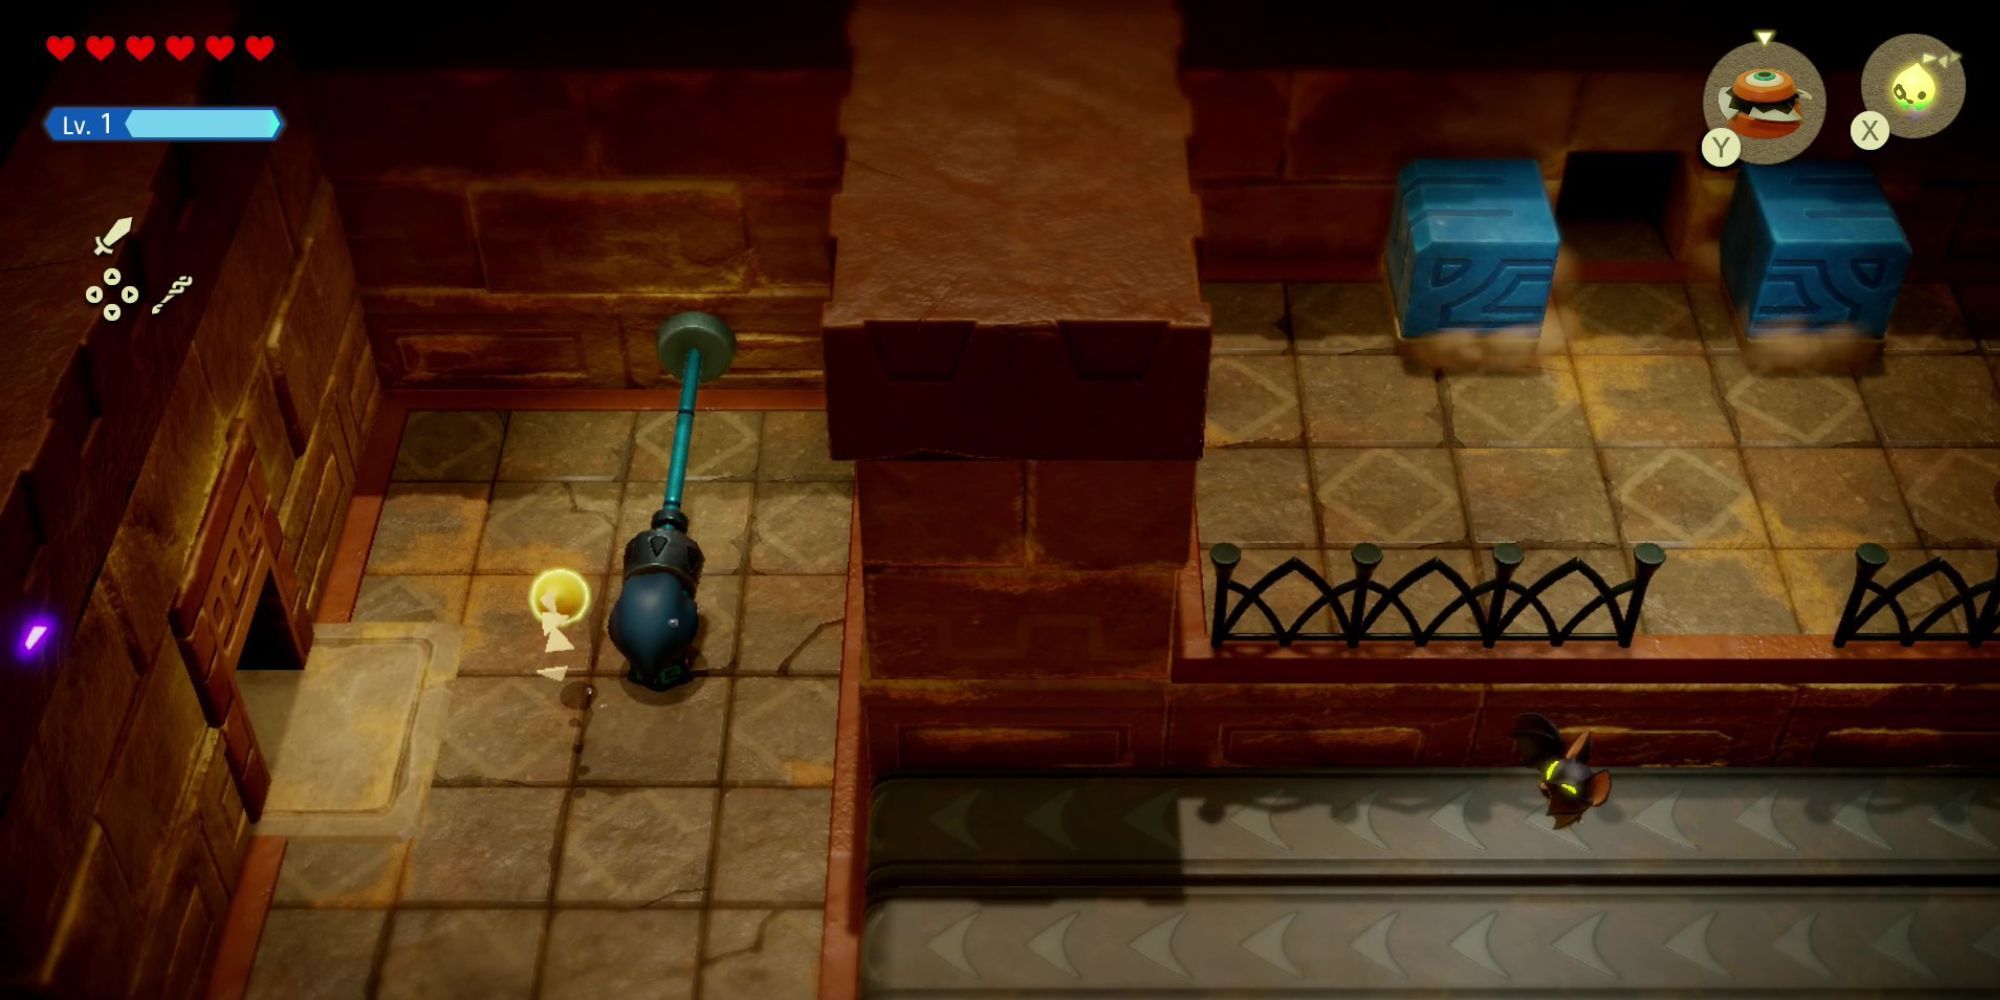
The very first thing you’ll come throughout within the Gerudo Sanctum is Hyperlink. Observe him up the ladder and head proper to begin making your method up the climbing partitions.
Make sure that to keep away from the Wind Cannon blasts, as they are going to push you off! Push the boulder off its ledge to dam the Wind Cannon beneath and go up the ladders to succeed in a Warp Level. Additionally, you will discover three doorways right here. One to the left, one to the precise, and one locked door heading straight ahead.
Take the door on the precise and seize the blue lever. Pull all of it the best way again and run over the conveyor belts to exit by the north door earlier than it closes once more.
If it shuts earlier than you get there, pull the lever again and take a look at once more. Use Bind on the following door to open it and declare your second Silver Key from the chest. Make your method again to the room with the Warp Level and take the door on the left this time.
This room is crammed with Flying Tiles that can hurl themselves at you nearly instantly upon getting into. Make sure that to be taught one in all their Echoes earlier than they’re all destroyed, and decide up one other Purple Rupee from the chest. Make your method again to the Warp Level and use the important thing to open the door beside it.

Associated
The Legend Of Zelda: Tears Of The Kingdom – How To Get The Darkish Armor Set & The Depths Armor Set
The Darkish Armor and Depths Armor units in Zelda: Tears of the Kingdom are among the finest within the sport, however they’re troublesome to gather.
Right here, you will see that 4 Elephant Statues. Study their Echo and transfer ahead to succeed in one other fight room, this one crammed with Mothula.
Defeat them and transfer by the door on the left to discover a chest behind a wall. You may’t entry this simply but, so transfer by the following door as an alternative. The following room is a bit difficult.
You may attain the chest in a while if you unlock the Warp Level outdoors the Sanctum. Use a Holmill to dig the patch of dust to the left of the Warp Level to succeed in it!

You must make your method throughout the conveyor belts to the picket bins on the left with out falling off. Create a rock on the conveyor belt and throw it on the bins so you may transfer previous them and down the ladder on the left.
Set a Pathfinder free to defeat the Caromadillo ready for you beneath and make your technique to the sandy part.
Use a Holmill, which is the easiest way to dig in Echoes of Knowledge, and drop down behind it to open the chest beneath. Gather the Golden Egg and proceed down by the sand to face off in opposition to one other Caromadillo.

This may be simply taken out with a Pathfinder, too, clearing your technique to the following room. The following space has one other Warp Level, together with a puzzle. The pill within the middle of the room reads as follows: Search two distinct tributes. Clues to the specified tributes are recorded someplace on this flooring.

You will want to put two statues on the tiles in entrance of the pill, however you do not but have what it’s essential to remedy the puzzle. Be aware of the room you are in so you may warp again right here later and transfer by the precise door. This room has one pesky Holmill and some mounds of sand.
Clear every little thing away, defeating the Holmill and uncovering a chest from one of many mounds of sand. Remember to learn the pill within the prime proper nook of the room earlier than you permit, because it holds an necessary clue.
The pill reads: It stands quietly within the sanctum. It’s blue in shade, with massive tusks and a protracted nostril. Bear in mind this clue and head again to the middle room. Undergo the left door this time.

This room has a Poe in it, which will be very annoying to defeat because it retains teleporting across the room. Quick Echoes, like snakes or flying enemies, are finest for this foe. As soon as defeated, accumulate the Dungeon Map from the chest that seems and head outdoors to come across Hyperlink for the second time.
Stilled Gerudo Sanctum
Observe Hyperlink to the left and up, utilizing Bind to wrench out a chest that was buried within the sand. Open it to gather a Purple Rupee and proceed to the precise.
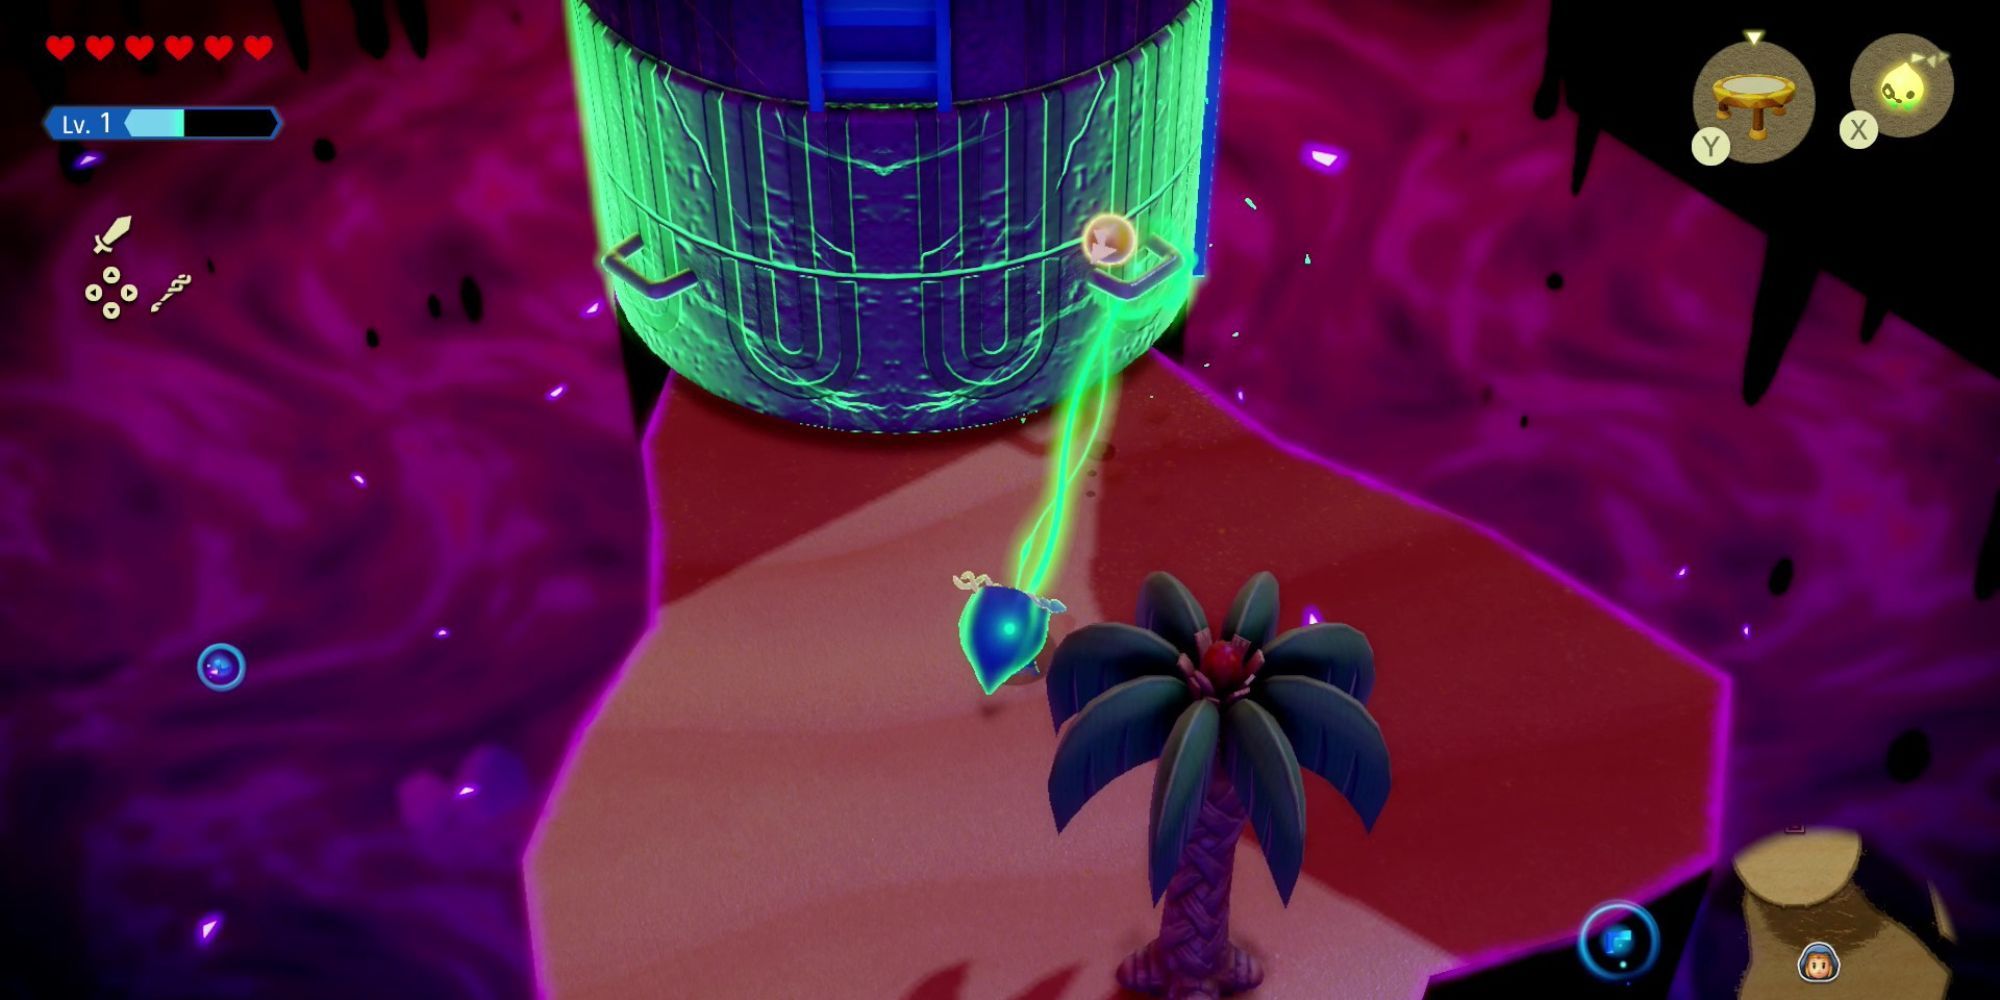
The way in which up is blocked by a big cylinder-shaped construction with ladders on one aspect. Use Bind to govern the ladder into place and climb as much as discover a Purple Rupee within the chest above. Climb the ledges on the precise to seek out yet one more Warp Level.
There are a few other ways again into the Sanctum that you would be able to attain from this Warp Level, however head to the pillar within the prime proper nook. This pillar is identical because the one you encountered earlier; simply use Bind to match the ladder items so you may climb to the highest and discover the Hawk-Statue Echo.
Head again down towards the Sanctum and into the door on the precise. This room has one other blue lever to drag that can open a door alongside the again wall.
This one is a bit more durable to succeed in, however you may make it with a few trampolines and a picket field. You do need to act quick, nonetheless, as a result of not solely is the door slowly closing on you, however the quicksand will slowly take in something you place on it, so time is of the essence.

When you make it by that door, you’ll be confronted with a room filled with Cat-Statues and Gibdo enemies. Take out the enemies, be taught the Cat-Statue Echo, and use a trampoline to jump over the inexperienced barricade blocking the door on the far aspect of the room.
Activate the Warp Level within the subsequent space and drink some smoothies or nap in a Mattress to gear up for the following room – since you’re about to lastly meet up with Hyperlink.
Boss – Bow Hyperlink

The battle in opposition to Bow Hyperlink will be difficult since he has a long-range weapon, and you do not. You may, nonetheless, use Swordfighter Kind and block any oncoming assaults with the defend.
For those who run your Swordfighter gauge dry, you too can deflect the arrows together with your spin transfer. Hyperlink splits himself into three copies on this battle, every of which you’ll have to defeat individually. Flying Echoes are first rate ones to make use of right here, however by far the most suitable choice is a few Piranhas.

Associated
The Full Legend of Zelda Timeline, Defined
To raised perceive the legendary universe of The Legend of Zelda, it is essential to grasp Hyrulean lore and the well-known timeline.
Piranhas will be discovered everywhere in the Gerudo Desert, so that you doubtless have them in your Echodex already. They’ve a comparatively low value, and so they additionally cannot be focused whereas they’re beneath the sand, so Hyperlink will not be capable of attain them along with his arrows.
As soon as you’ve got defeated Hyperlink as soon as once more, decide up the Bow of Would possibly so you need to use it your self in Swordfighter Kind.

The way in which by the following cavern is blocked by a black and purple membrane. You may both construct a bridge of Beds, cross to the opposite aspect, and slash on the barricade together with your sword, or use your new Bow of Would possibly to destroy the substance and then construct a bridge of Beds to cross.
Both method, ascend the ladders when you get to the opposite aspect to succeed in the second flooring.
Gerudo Sanctum Second Flooring
Activate the Warp Level and begin making your technique to the precise, hiding behind Boulder or Stone Echos to keep away from the flames. Study the Elephant-Statue Echo when you attain the opposite aspect and open the chest to gather one other Silver Key.
Climb up the ladder on the left to make your method again to the beginning of the room and use the Warp Level to move your self again to the lengthy hallway you have been in earlier than the battle with Hyperlink. Head south after which proper to open the locked door together with your Silver Key.
The room seems empty, however there’s a secret wall hiding alongside the again wall. Use Bind to open it and move by to discover a small flamethrower puzzle. To start, shoot the picket field that the Wind Cannon is mounted on so it is not blowing on the torches.

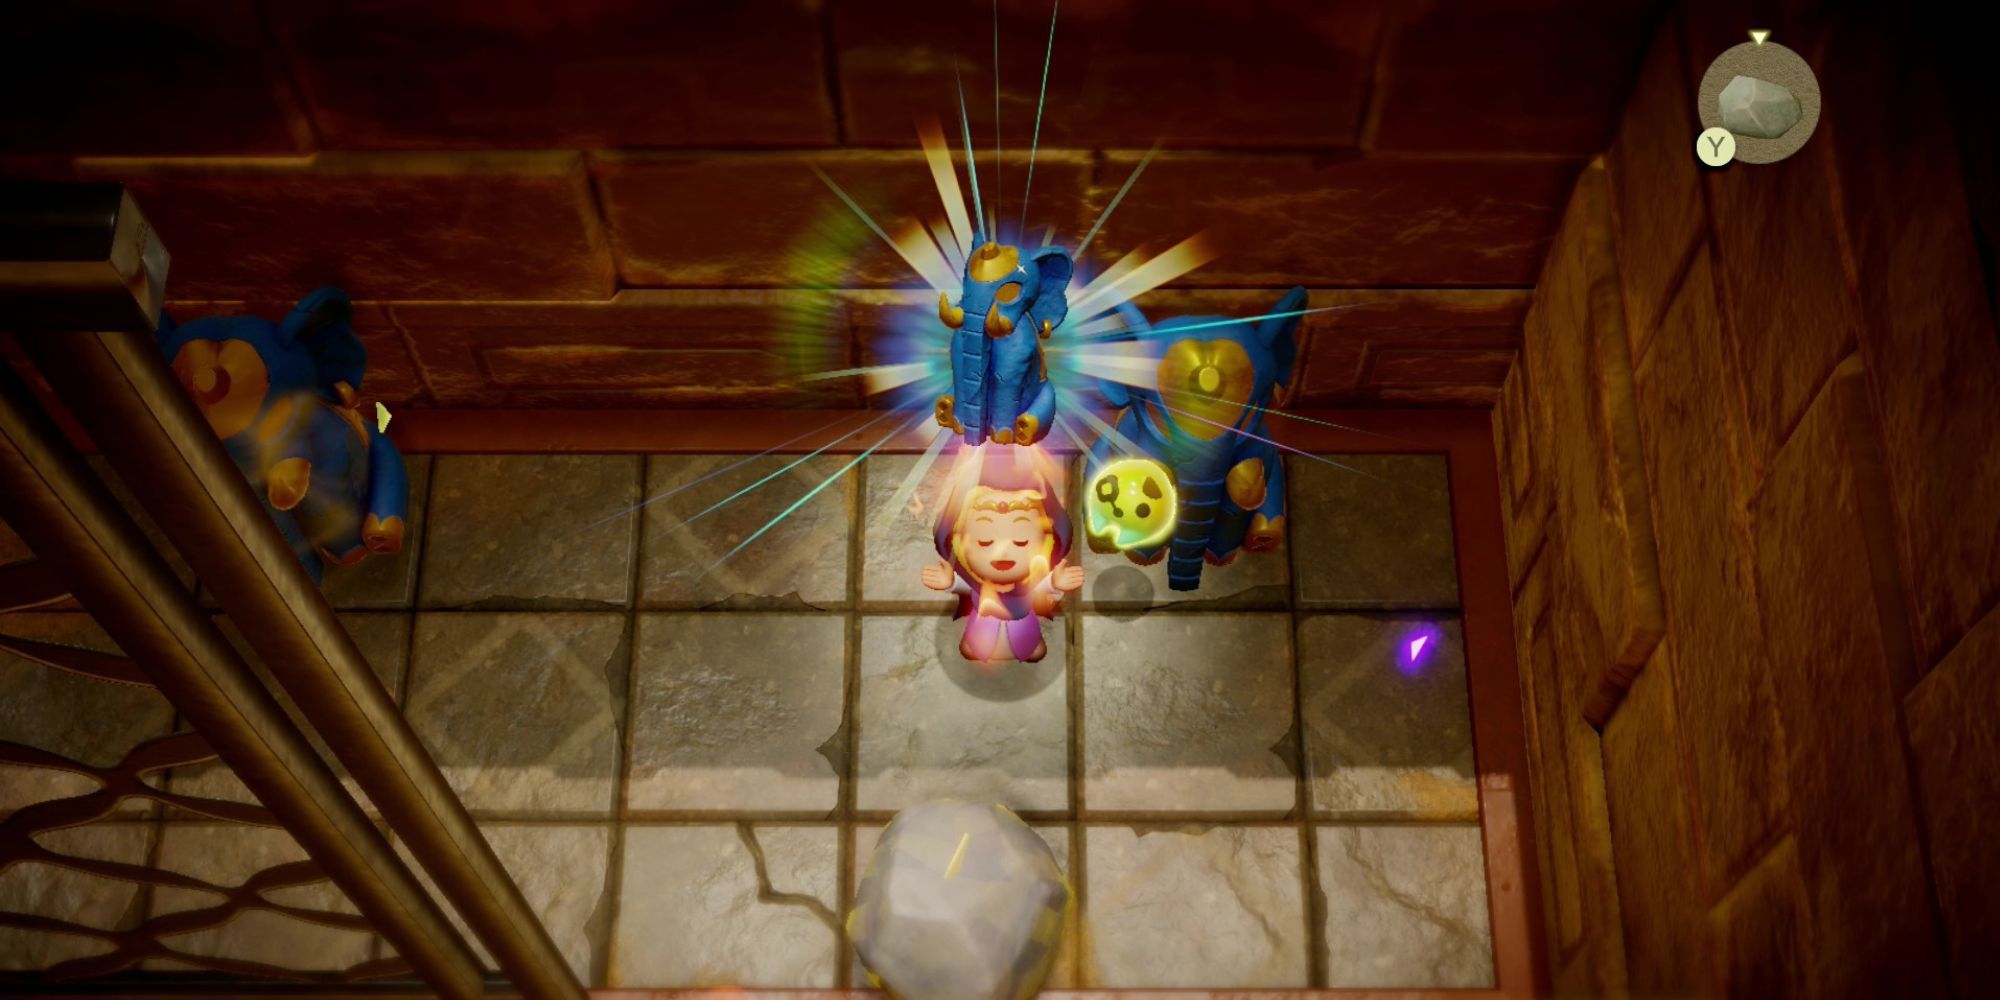
Then, Bind the flamethrower within the middle of the room and spin it round to mild all three torches. When you do, the second clue will seem. The clue reads as follows: It rests atop a tower. It bears sharp eyes and a powerful beak.
This clue hints on the Hawk-Statue we collected from outdoors earlier. Since you’ve got already obtained it, head again to the Warp Level and teleport again to the puzzle room.

Place the Elephant-Statue Echo on one tile and the Hawk-Statue Echo on the opposite to unravel the puzzle and open up a door main north. Move by it and pull the plug on the precise wall to seek out the room containing the Boss Key.
The Boss Key’s trapped inside a big contraption that’s considerably much like the ladder pillars discovered outdoors the dungeon. There are three stone circles across the Boss Key chest within the middle.

Spin the wheel within the nook round till the hole in every stone strains up with the hole within the flooring. This works completely for the blue circle, however you have to to spin the inexperienced one as soon as with Tri’s Bind to line it up appropriately.
Repeat this with all three rings till the Boss Key has been launched. Gather it and observe the steps on the precise to succeed in the Boss Room.
Boss Struggle – Mogryph

The Mogryph is a big sand-dwelling Mole enemy. The battle could seem intimidating at first, however for those who observe a quite simple methodology, it is possible for you to to defeat Mogryph very quickly.
Mogryph has two to a few most important phases, relying on how lengthy it takes so that you can beat him.
Part One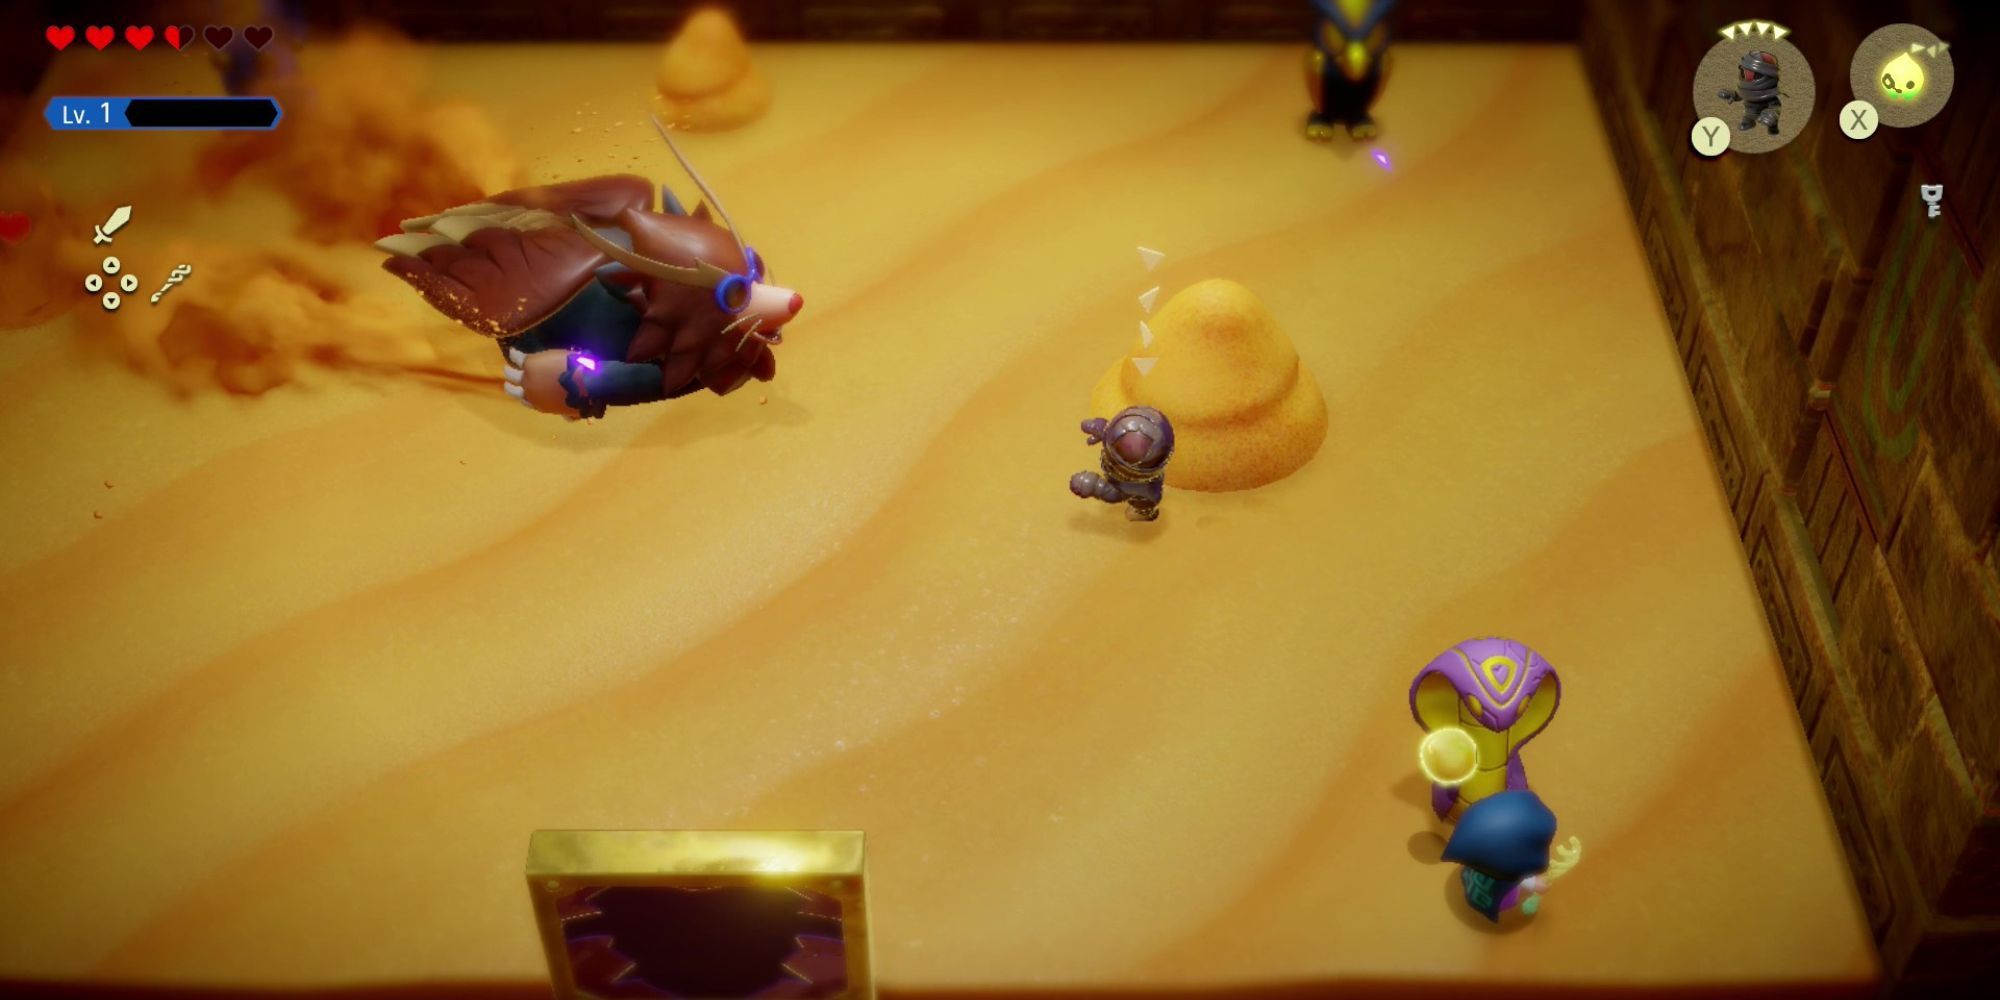
The primary begins with the beast swiping sand at you. You may fight this through the use of your new Bow of Would possibly to shoot arrows whereas dodging, and utilizing Piranhas or one other Echo of your option to assault him when you present the distraction.
As soon as this transfer is over, Mogryph will dive into the sand and swim round in circles for some time. You may’t hit him throughout this transfer, so do not hassle making an attempt. Take this time to run and conceal behind one of many 4 statues within the room. The Mogryph will rise to the floor and cost at you.
Place your self in order that he hits the statue as an alternative of you and knocks himself out for just a few seconds. Summon your strongest Echo and assault as a lot as attainable till he recovers.
Part Two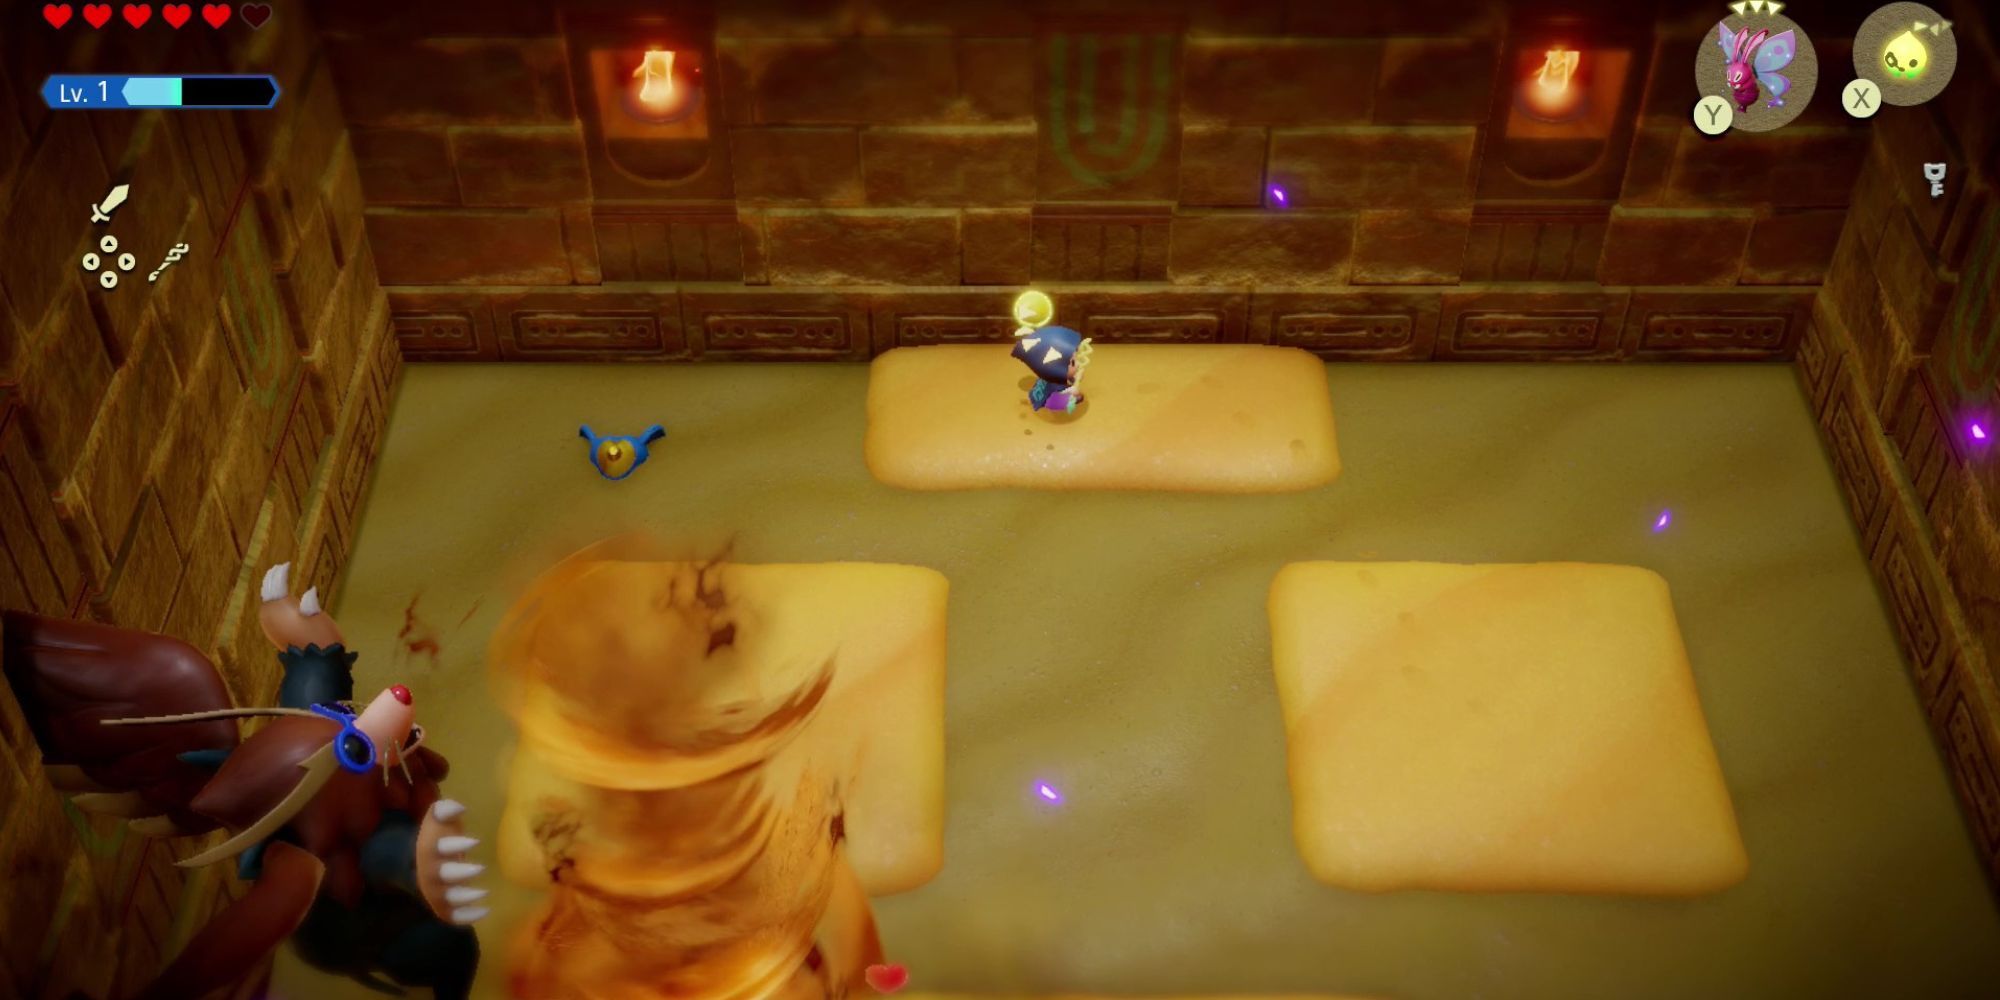
Part two begins with the Mogryph leaping into the air, the place he unleashes a few completely different assaults. The primary is a collection of tornadoes. These tornadoes will be devastating when you have low well being, so ensure to keep away from them whereas utilizing Swordfighter Kind to hit the Mogryph with arrows.
The second assault he makes use of is a divebomb. You may see the place the Mogryph goes to land by paying attention to the shadow. Ensure you’re not standing within the affect zone when he lands. After that, the Mogryph will dive again beneath the sand once more so you may repeat the identical techniques as earlier to knock him unconscious. The statues from the primary part are gone, nonetheless, so you’ll have to summon your personal simply earlier than he is about to cost.
Part Three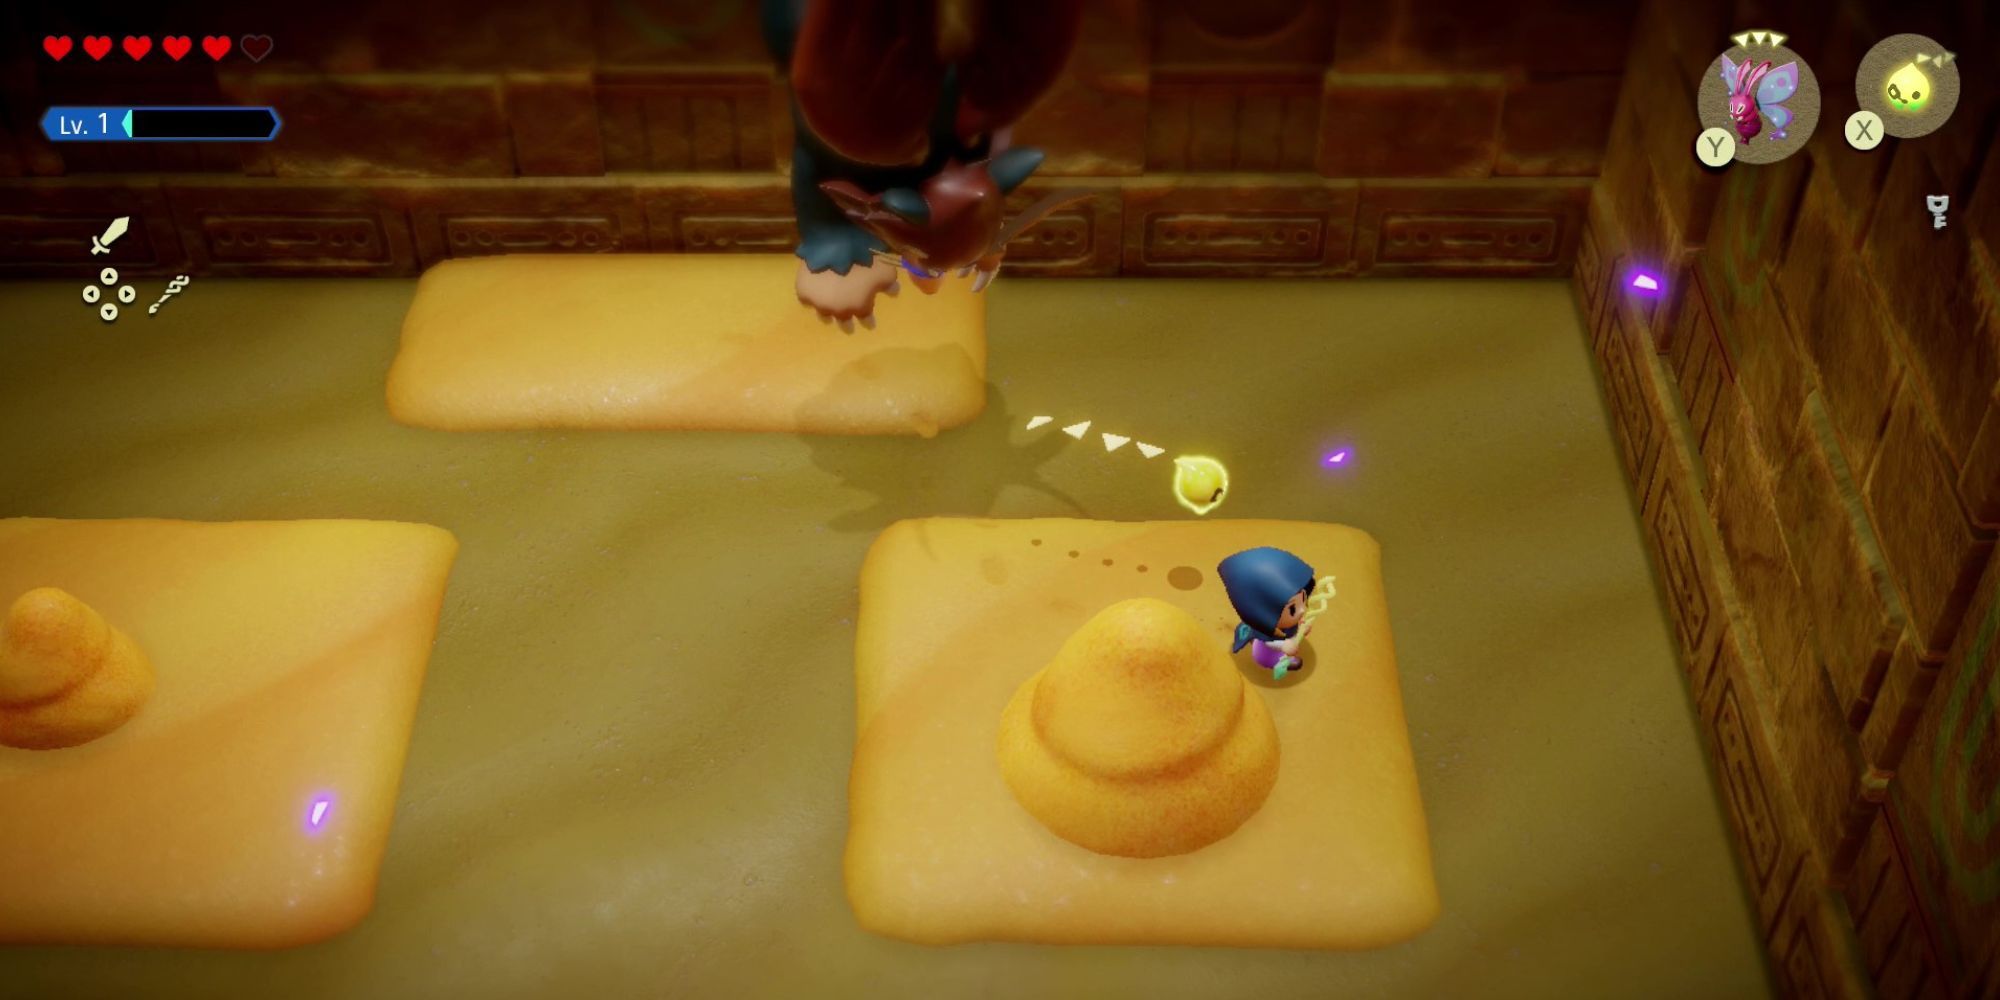
Part three comprises the entire above assaults in a single part. That is all of the wind and flying assaults from part two, plus the sand swipe transfer from part one, and, in fact, the underground cost transfer that you need to use to take the Mogryph out as soon as and for all.
Echoes of Knowledge is a comparatively brief journey, particularly in comparison with among the different video games within the collection. For those who’re nonetheless on the lookout for extra enjoyable Zelda video games and missions to finish, there’s a plethora of aspect quest to finish in Tears of the Kingdom to maintain you busy.

The Legend of Zelda: Echoes of Knowledge

Subsequent
DualShockers Definitives: 10 Finest Open-World Swap Video games
From Skyrim to Zelda, these are the very best open-world video games on the Nintendo Swap.